The Raspberry Pi is the babby computer that won’t quit – it’s cheap, powerful (for its size and price) and you can do a million things with it. However, the skinny price on the Pi also means it’s slim on the peripherals – no keyboard, no storage, no monitor and no manual. You need to gather the bits and pieces you need to make it work the way you want it to, and with much head scratching and healthy googling, figure out how it all goes together.
And in doing so you’ll both live, laugh and learn.
Well, the Pi won’t laugh so much as flicker an LED or two. Or crash. Many times.
But that’s part of the fun!
For the first part in our series on care and feeding of your new Raspberry Pi, we’re gonna look at a vital component – The SD card.
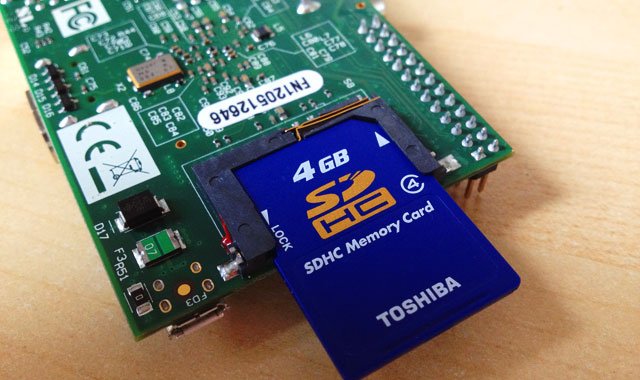
The Raspberry Pi’s SD Card
The Raspberry Pi has no built in storage, instead it is set up with an SD card reader – the user must provide an SD card for the device to use for the chosen operating system and storage.
The requirements are pretty modest – you’ll need at least a 2GB card, but you’ll most likely want something with bit more space for storage. SDHC cards are sometimes recommended as they are believed to hold up better to larger amounts of read/write cycles, something we’ll examine below.
The Raspberry Pi, as you may have heard, can be somewhat finicky when it comes to peripherals. It supports a wide range of hardware, but it may also flat-out refuse to recognise the existence of certain brands, models and makes of hardware. Most will be lucky enough to find the Pi works just fine with the bits and pieces they have laying around, while others will have to shell out for some extra stuff to get the mini computer running, as the Pi might just turn its nose up at that old keyboard, or snub the SD you had floating around in your top drawer.
The place to go before you plonk down any cash on hardware for your Raspberry Pi is the elinux.org Rpi Verified Peripherals page, which can be found at:
http://elinux.org/RPi_VerifiedPeripherals
This is a list of peripherals of all sorts, from SD cards to fingerprint scanners and everything in between, all of which have been verified to work properly with the Pi. If you plan on buying any hardware for your Pi, check here first so you know it will definitely play nicely.
For SD cards, there is a dedicated page here: http://elinux.org/RPi_SD_cards. Scroll down to the huge list of cards with the red and green boxes down the left hand side. Green means good, Red means nope. Check the card you intend to buy against this list and make sure it’s listed as ‘ok’.
Note: The list at elinux.org is by no means exhaustive. If you’ve got a card laying around that’s doing nothing (like in my case where I had a 4gb sitting around after a digital camera storage update), just give it a go. If it doesn’t work, no big loss. But if it does, you might save yourself a couple of bucks.
For the record, I’ve had good experiences with several Transcend class 10 16gb cards, and a single bad experience with an old Kingston 2GB.
The SD Card Corruption Problem
A common problem that can arise with regards to your Raspberry Pi’s SD card is that of corruption. if your SD card has become corrupted, you’ll most often find the Pi will halt when booting up, giving you an error message, something along the lines of:
mmcblk0: error -110 transferring data, sector 121, nr 888, cmd response 0x900, card status 0xb00
The corruption of the SD card occurs generally when the power is interrupted while the OS is writing data to the card, such as if the power cord is yanked out, or if your power supply is slightly dodgy and the voltage getting to the Raspberry Pi fluctuates enough to briefly power down or ‘brown out’ the system.
Another culprit could be changing the overclocking settings. I’ll just state for the record: I’ve had a Raspberry Pi overclocked to maximum running every day for months (a Retropie installation) and haven’t had a single problem – but it is widely reported to be a contributing factor to corruption problems. It seems some cards can handle overclocking better than others, so if you think overclocking could be to blame for your SD card woes, try reducing the amount of overclock, or maybe try another card.
Corruption is also very likely if the SD card is unseated, moved around or removed while the Pi is turned on, so make sure the Raspberry Pi isn’t somewhere where it can be bumped or fall off the edge of the table.
If you read around, you’ll also find that the general consensus is that el-cheapo or knockoff cards are also much more prone to becoming corrupt. If you’re using a no-name or a fake SD card and are experiencing corruption problems, it might be worth shelling out for a better card.
Preventing Corruption
So how do we stop the corruption monster from rearing its ugly head? Unfortunately there’s no sure way to 100 percent stop your card from being corrupted. The barebones nature of the Raspberry Pi means that a lot of the sophisticated solutions that prevents problems like this in fully-fledged computers simply aren’t present. So if you fiddle around with Raspberry Pis as a hobby you are going to encounter this problem at some point. Here’s some tips to at least make it happen as infrequently as possible.
Use a good power supply
Using the right power supply will save you a lot of corruption headaches. The Raspberry Pi needs a regulated 5 volts, at 700 milliamps (700mA). Most powered USB hubs can deliver this power requirement with ease, and so make a good choice for powering the Pi.
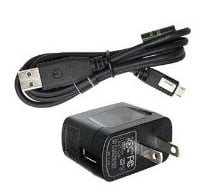
A common temptation for those wanting to run the Pi off the wall is to grab a handy micro USB cell phone charger. A lot of these will work just fine, but some won’t and may not deliver the amperage the Pi requires – which can lead to SD corruption problems. Check the label on the plug and look for the milliamp (mA) rating – if it isn’t at least 700mA then it may cause problems. Many users recommend a 1000mA (or 1A – 1000 Milliamps = 1 Amp) supply just to be safe. A very common regulated 5V 1mA power supply you may have laying around is the charger brick that comes with the iPhone.
Similarly to the issue with dodgy SD cards, a cheap-and-cheerful eBay special USB-to-Mains converter may also cause problems, as being cheaply made and mass manufactured sometimes they are not quality checked to ensure they are delivering the voltage and amperage they claim to.
As always, if in doubt check the Verified Peripherals list and grab something known to work. There’s wall wart options on there that go for as little as $3 on Amazon and Ebay – such as this verified working Motorola Travel Power Supply.
Shut Down Safely
Shutting down the raspberry Pi properly will also go a long way towards avoiding the dreaded SD card corruption problem. This is as simple as taking the time to click the ‘shutdown’ (or whatever varation your OS of choice uses) button in your GUI and waiting until the Raspberry Pi goes through its shutdown sequence before pulling the power cord, or if you are working from the command line, use the following command:
sudo shutdown -h now
This tells the Raspberry Pi to issue a command as a Super User (sudo), to shut down (shutdown), and to halt, or power off (-h) and the time to do it (now).
You’ll see some lines of system messages flash down the screen, and when the screen goes black and the lights on the Pi stop blinking, you can safely cut the power.
Use a better SD card
While the Raspberry Pi may somtimes very happily use a cheap or knockoff card with no problems, these cards can be the source of corruption problems, so if you are experiencing issues, upgrading your card may be a solution. Make sure you are using a legitimate card that has been verified to work on the RPi Verified Peripherals list http://elinux.org/RPi_SD_cards.
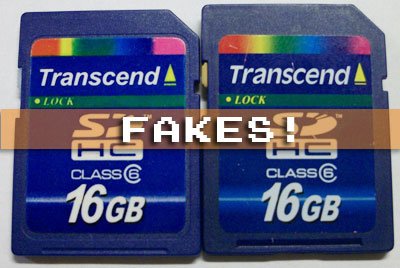
Another quick note: If you’ve got a seemingly legit card and are still experiencing problems, maybe think back to where you got it and take this food for thought: According to this article http://petapixel.com/2011/05/20/one-third-of-the-sandisk-memory-cards-on-earth-are-counterfeit/ around one Third of the sandisk cards (the brand highly recommended for the Raspberry Pi, and just about any device that uses SD for storage) in existence are fake, and about 70% of the cards sold on eBay are fakes. So if your verified, name-brand SD card is still giving you issues, but you do recall getting it for a bargain price on eBay a few months back, you may be dealing with a dodgy counterfeit.
Attack of the Clones
This won’t stop the SD from becoming corrupt, but it will reduce the pain and anguish that corruption can bring around. As you all should know, backing up your data is an absolute must in this day and age, and everyone should have a backup solution for their PCs, phones and tablets, to avoid catastrophic data loss if something is lost, stolen, or goes on the fritz. The Raspberry Pi SD card is no exception.
The problem is, its highly likely that you’re a Windows or OSX user, and as such your computer can’t read all the files and partitions on the Raspberry Pi’s Linux-based filesystem, preventing you from simply sticking the card into a card reader and copying all the data over to a backup drive.
You could find or install a Linux operating system on another computer, allowing you to happily peruse and backup all the files on the Raspberry Pi’s SD, (if you’re already running Linux then this is a viable option) or you could just clone your SD card using a handy little free utility and call it a day, leaving you with a perfect mirror image of all the files on your SD card that can be easily restored on to a reformatted or brand new SD card in the case of a corruption problem.
Using the free utility win32diskimager, you can make an exact copy (known as an ‘image’) of everything (unreadable partitions and all) on your SD card, and store it as a single backup file on your PC. When the time comes to restore or re-image a new card, you can use the same utility to clone the image back onto the new SD card. This process is also super handy if you have a perfectly tweaked installation (say, of XBMC or RetroPie) and want to build another device that holds all the same data, such as for the TV upstairs, or as an emulation box to give to a friend – just clone and re-image, and save hours of re-work getting the new installation to work just right.
Downloading and using win32diskimager is a pretty simple process, which has already been detailed over at Lifehacker beautifully, so for all your Raspberry Pi SD card cloning needs, click here to check it out.
http://lifehacker.com/how-to-clone-your-raspberry-pi-sd-card-for-super-easy-r-1261113524
For OSX users, the process is slightly different – no downloads needed, but there is some Terminal command line use involved. Don’t be scared though – as a Raspberry Pi warrior you should be getting nice and cosy with the command line by now, and the single command used is pretty straightforward and easy to follow – check out this Stack Exchange post for detailed instructions.
http://raspberrypi.stackexchange.com/questions/311/how-do-i-backup-my-raspberry-pi
The USB way
There’s a final step you can take to avoid SD card corruption on the Raspberry Pi, and that’s to move all the read/write work off the card completely. It’s possible to use your SD only for booting up your device, and keep all the data on a USB stick or hard drive. This involves creating the filesystem for your chosen installation on a USB stick, and adding a line of code to the SD card to point the bootloader over to the USB stick.
Many people do this not just to help avoid the SD card corruption problems, but with a fast USB stick the system can become much snappier too. It’s particularly popular for XBMC installations, where many users found the speed of getting around the menu system to be a bit laggy running off the SD card.
The only caveat is you will use up a USB port, which might be fine if you are using a powered USB hub, or not using more than one usb device on your Pi, but may be problematic for those wanting to keep the cords and devices hanging off the Pi to a minimum.
We’ll publish a full guide for using a USB stick as your storage medium for the Raspberry Pi later this week, but if you’re super keen you can check out guides here:
Raspbian – Dingleberry Pi: Install and Run Raspbian from a USB flash drive
http://www.dingleberrypi.com/2013/05/install-and-run-raspbian-from-a-usb-flash-drive/