One huge contributor to the Raspberry Pi’s huge popularity would have to be its extreme aptitude in handling streaming media.
Despite being relatively low powered (although, for 35 bucks it’s hard to complain!) in the CPU and ram stakes, it handles high definition video like an absolute champ, and this has led to a proliferation of keen tinkerers forgoing a large, expensive and power hungry HTPC for a cheap, quiet, and low powered Pi for the prime position under the living room box.
Along with HD video, music is another area where the Raspberry Pi can really shine.
Popular streaming services like Pandora and Spotify have found their way onto the SD card of many a Pi build already, and inroads are being made toward integrating these services into the currently popular media centre projects doing the rounds as we speak.
Regular old internet radio streams also flow with relative ease through the miniscule synapses of the Pi as well, with command line driven and gui applications for handling streams readily available for download with only so much as a ‘sudo apt-get’.
However, some of the aspects of the Raspberry Pi that make it such an attractive choice for a set-top setup, such as low power consumption (an estimate I read recently stated that at the low 5V operating power of the Pi, if left on for an entire year it would consume around $4 USD of electricity) small size, and eminent tinker-ability, have led to another type of project to gain a huge amount of popularity recently – building a stand-alone streaming internet radio player.
The relative ease in breaking out from the GPIO to talk to physical buttons and LCD displays, the small, embeddable size, and the networking options baked into the Pi allows the ability to produce a very cool and functional device that’s perfect for enjoying streaming music the old school way: flip a switch, turn a dial, and rock out.
Anyone with a little patience (or maybe a lot, depending on how you look at it) to learn some simple electronics, fiddle with some Python code, and get their head around a breadboard can hack together a fully functional physical internet radio device, drop it into a nice looking enclosure and be left with a very cool device that would be right at home in a bedroom, on top of the stereo or anywhere where the old FM radio once reigned.
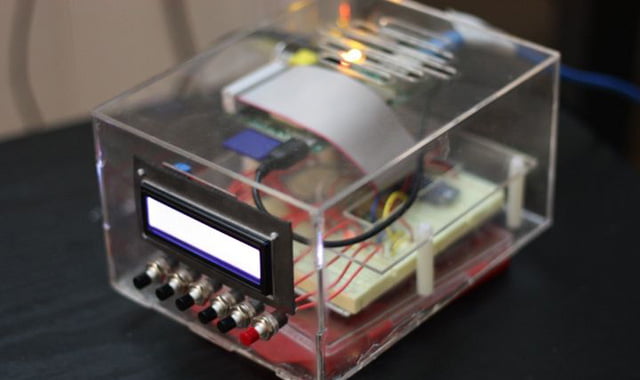
Here’s an example of a Pandora streaming device with the Raspberry Pi.
The creator Ayy was kind enough to post an instructable with parts and build instructions here: http://www.instructables.com/id/Pandoras-Box-An-Internet-Radio-player-made-with/
Youtube guy meistervision created an internet radio streaming device with the Pi doing the heavy lifting, playing good old fashioned radio streams using mpc. Additionally, his video is easily the most informative and instructive of any I’ve seen yet, going over the entire build from wiring to programming, providing source code, and even going through plugging the breadboard and explaining the components step by step. If you’re interested in building one of these, this video is the place to start.
Edit: While I found this video extremely straightforward, meistervision mentions that he is building off concepts provided in this video:
Raspberry Pi – How to use the GPIO
Which may help demystify using the GPIO on the Raspberry Pi if it’s giving you trouble (it will).
And finally, the granddaddy of these projects, in my opinion, is this build by youtube guy jliu83.
Using the Pianobar command line interface to create a standalone Pandora player, jliu83 has created a cracking device using an elegant control scheme base around a rotary encoder, integrated speakers, a sexy 4-line white on blue lcd to show the meta info for each song and artist, and housed it all in an attractive stained wooden enclosure.
This is a slightly more involved build (it took him 8 months in his spare time, that he describes as “a ton of fun… and frustration”) and uses a microcontroller to handle the I/O for the buttons and LCD, but this does show what these projects can look like with enough spit and polish.
Oh, and I do realise he used the Beaglebone, a ‘competing’ credit card sized micro computer to the Raspberry Pi. But as you can see from the other projects above, there’s no reason why a build of this calibre couldn’t be achieved using the cheaper and more easily available Raspberry Pi.
So that’s just a small roundup of examples of this very cool project idea you can base around the Raspberry Pi. Have a search around and you’ll come up with quite a few more examples of projects of this ilk – there’s a couple of very cool builds that use old AM radio cases as the enclosure to give that authentic retro radio look – and there’s more than enough info out there to get you on your way to building a Pandora’s box of your very own.
